Hi Everyone! I am Nicole, Lindsay’s sister-in-law, and this is my first guest post for Cremona’s Kitchen. Easter has always been one of my favorite holidays. What’s better than chocolate, dying eggs and spending time with family? This Easter, however, I decided to bring something home to share with everyone. And I must say, this fun twist on traditional deviled eggs is quite adorable.
Ingredients:
- 3 quart cooking pot with lid
- zip lock bag or piping bag
- 12 eggs
- 1/3 cup of mayo
- 3-4 tablespoons of pickle juice
- 1 baby carrot
- 1 pickle
- salt and pepper
- spinach cut into shreds (to look like grass) or decorative Easter grass found at stores
Directions:
- Boil all 12 eggs in a large pot for roughly 15 minutes. Take eggs out and put them in an ice bath. Once cool, peel.
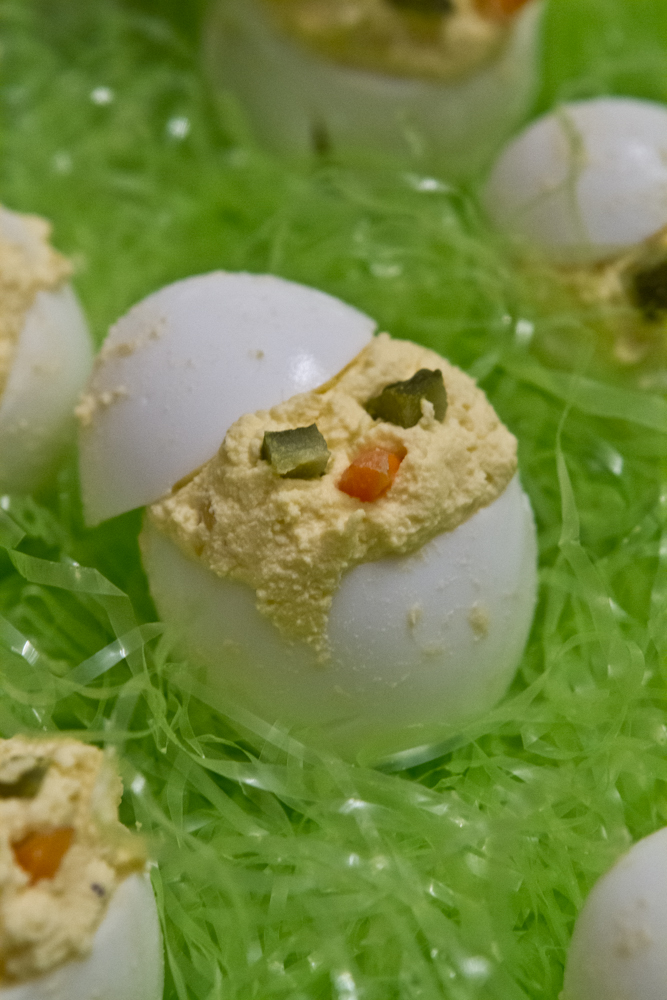
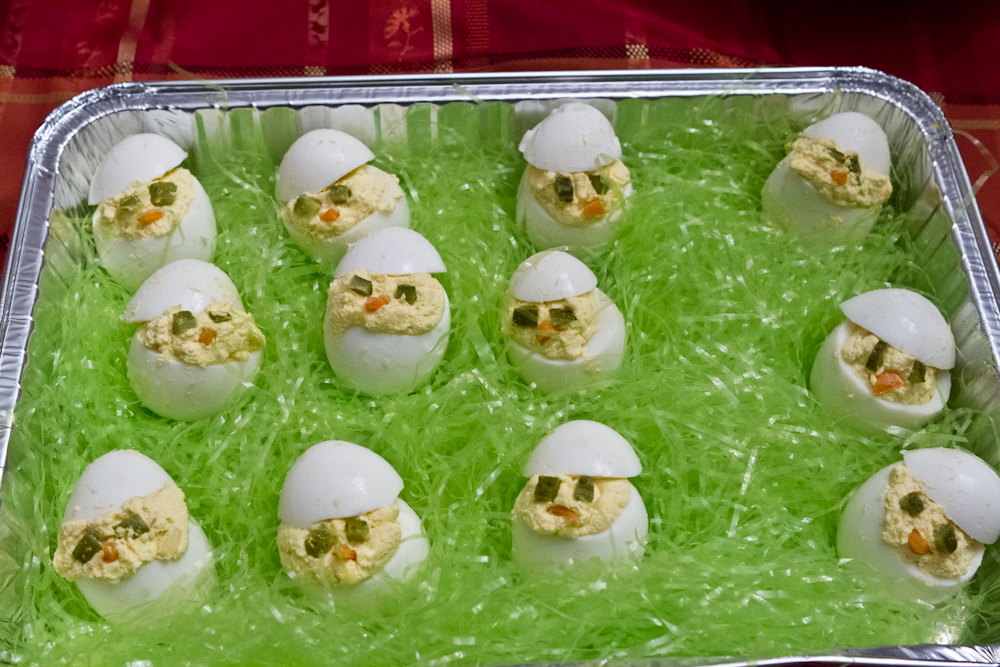
- When you have finished peeling the eggs, cut a small section off the wide egg, which will serve as the foundation for the egg to sit upright on. On the other narrow end, cut a wider section (about 1/3 of the egg) off; this will be the chick’s hat.
- Take the eggs and pop the yolks out into a bowl.
- Smash the yolks into small pieces using a fork. It is important to get the yolks into small enough pieces because otherwise your chick’s middles will look lumpy.
- When you have finished smashing your yolks, add 1/3 mayo, 3 tablespoons pickle juice, and add salt and pepper to taste. My yolk still seemed to be thick, so I added more pickle juice to thin it down, you may do the same. Mix all ingredients well and then place them into a ziplock or piping bag.
- In order to make the chicks eyes, cut a baby pickle into 4 thin strips. Take these thin strips and cut them into even smaller strips or squares to make an eye. Take the baby carrot and do the same by cutting it into 4 thin strips. With the 4 thin strips, cut them into a triangle shape for the chick’s beak.
- Cut a corner off the end of your ziplock bag, and fill each egg. Take the top of the egg and place it back on at an angle. This way you and everyone else will be able to see their faces. Add the eyes and beaks. Enjoy! : )
Source: A Thifty Mom


1 Comment
I made these and they looked so cool.. Thank you for the recipe Nicole and Lindsay